# Linux recovery file from android device or sd card 💻 📱
This is a quick overview from
roubert android file recovery main source (opens new window)
last one is useful for android internal memory here i'll highlight also for sd card memory recovery 🤘
# Prerequirement
The phone needs to be rooted. That sucks (yes, I prefer to keep my things stock if possible!), but if the files are important enough the hassle is worth it. If your phone was already rooted, you are good to go.
https://kingroot.net/
BusyBox (opens new window) installed on your Android device The Android SDK (opens new window) to get adb (opens new window). Just download the (big) SDK, (unpack it)[http://developer.android.com/sdk/installing/bundle.html] and run adb from within.
The programs TestDisk (opens new window), Pipe Viwer (opens new window) (pv) and optionally extundelete (opens new window) (if we are to recover files from ext3/4 filesystems)
apt-get install testdisk pv extundelete
# Instructions
Activate USB Debug on your device (opens new window) (in order to connect with adb)
Attach your device to the computer via the USB cable
Open a terminal on your computer, go to the Android SDK directory's subdirectory sdk/platform-tools (where adb is located)
Log in to your phone with adb shell:
./adb shell(NB: You might have to implicitly call adb start-server as root first if the command above fails.)
Now we can either use the mount command to find out what partition holds the SD Card data and dump that one, or we just dump out the entire memory content and skip the thinking part. I find the latter preferable, since the thinking part involved in the first approach is always prone to fail. So then you want to search for a block device called something like
VERY IMPORTANT Unlike roubert recovery method which is useful for internal memory, here i also identify it for sd card.
by convetion internal memory is
/dev/block/mmcblk0sd card is
/dev/block/mmcblk1shell@android:/ # ls /dev/block dm-0 dm-1 dm-2 loop0 loop1 loop2 loop3 loop4 loop5 loop6 loop7 mmcblk0 mmcblk0boot0 mmcblk0boot1 mmcblk0p1 mmcblk0p10 mmcblk0p11 mmcblk0p12 mmcblk0p13 mmcblk0p14 mmcblk0p2 mmcblk0p3 mmcblk0p4 mmcblk0p5 mmcblk0p6 mmcblk0p7 mmcblk0p8 mmcblk0p9 ram0 ram1 ram10 ram11 ram12 ram13 ram14 ram15 ram2 ram3 ram4 ram5 ram6 ram7 ram8 ram9 vold zram0 shell@android:/ #
Here we see that there are several partitions within mmcblk0, but we leave it for TestDisk to take care of the partitions later.
Exit the shell to go back to the Android SDK directory's subdirectory sdk/platform-tools on your computer.
Now let us dump the content of that /dev/block/mmcblk0 that we found to the computer. With adb shell we can become superuser and execute cat to dump the content like this:
$ ./adb shell su -c "cat /dev/block/mmcblk0" | pv > mmcblk0.raw
Pipe Viwer (pv) is optional, but I like to see the transfer progress information it provides. (And of course you can change mmcblk0.raw to some other directory/filename if you want to.)
Addition: André Paixão wrote to me that he just got an empty file with the command above. He solved it by using adbd insecure (opens new window).
Addition: Daniel Jeliński wrote to me that he ran into issues with LF encoding (opens new window). The solution that worked for him was:
./adb shell su -c "cat /dev/block/mmcblk0" | pv | sed 's/^M$//' > mmcblk0.raw
...where ^M is what you get by pressing Ctrl+V followed by Ctrl+M.
Addition: Marc also ran into the LF problems, but solved it this way:
./adb shell "su -c 'stty raw; cat /dev/block/mmcblk0'" | pv > mmcblk0.raw
Addition: Tim de Waal wrote to me that he prefers using netcat/gzip instead:
On the Android device (adb shell with su), run:
dd if=/dev/block/mmcblk0 | gzip -9 | nc -l 5555
On the computer, run:
nc [AndroidIP] 5555 | pv -b > mmcblk0.img.gz
Now wait until the transfer is done. For a 8 GB device it does not take too long, but still there is time to check some e-mails and browse the web while it finishes.
With the dump on the Linux machine's file system, now we can let TestDisk take it from there:
$ testdisk mmcblk0.raw
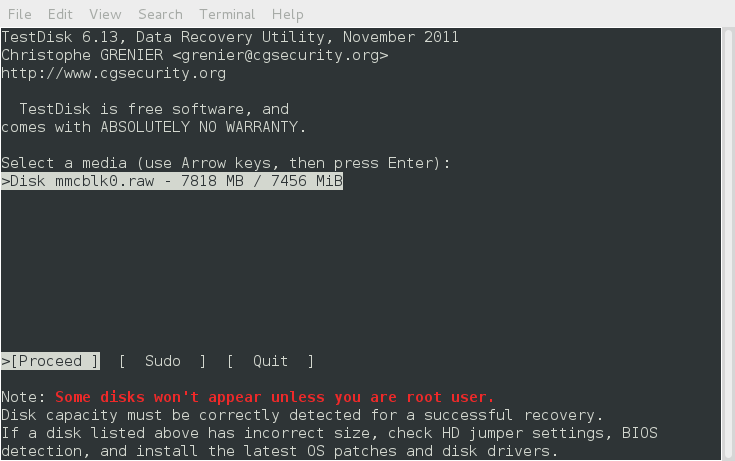
- First restore the GPT partition table. Select mmcblk0.raw in the TestDisk interface and choose Proceed:
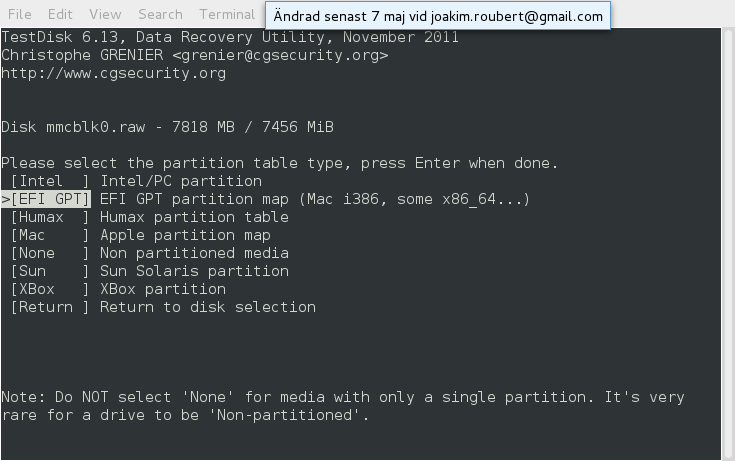
Choose EFI GPT partition map:
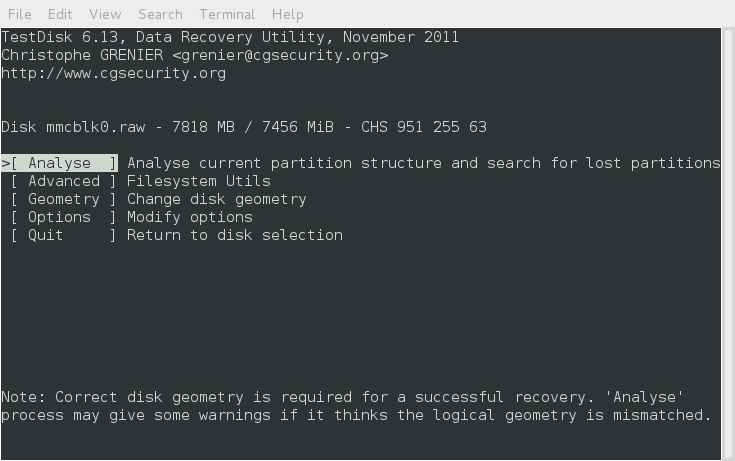
Then select Analyse in order for TestDisk to find the partitions:
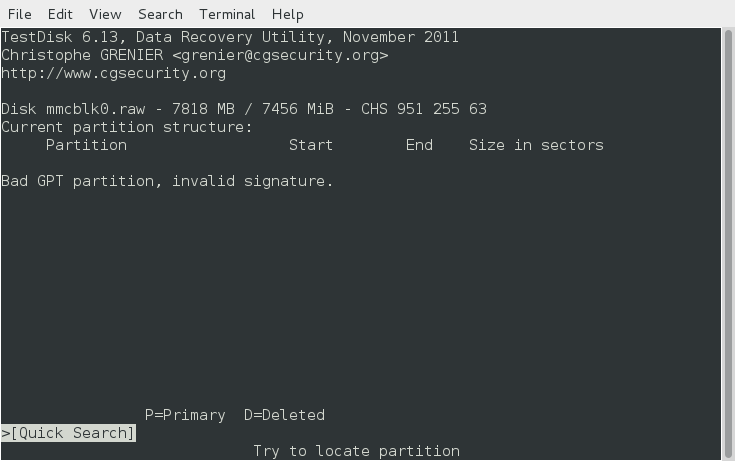
Choose Quick Search:
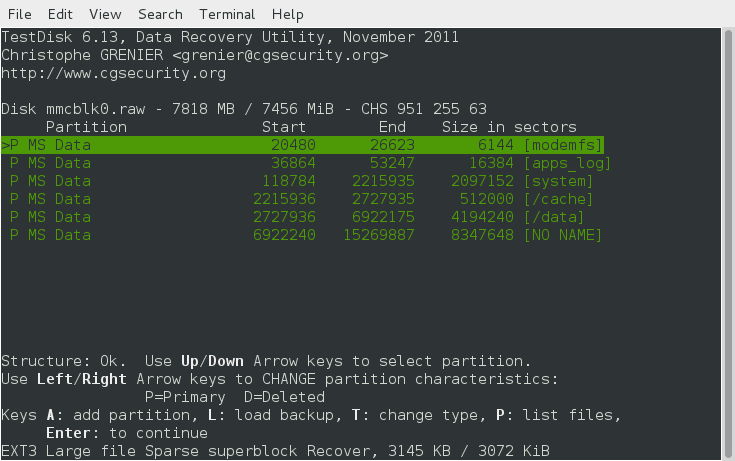
Hopefully the search will return a nice table like this:
Then just press enter to continue.
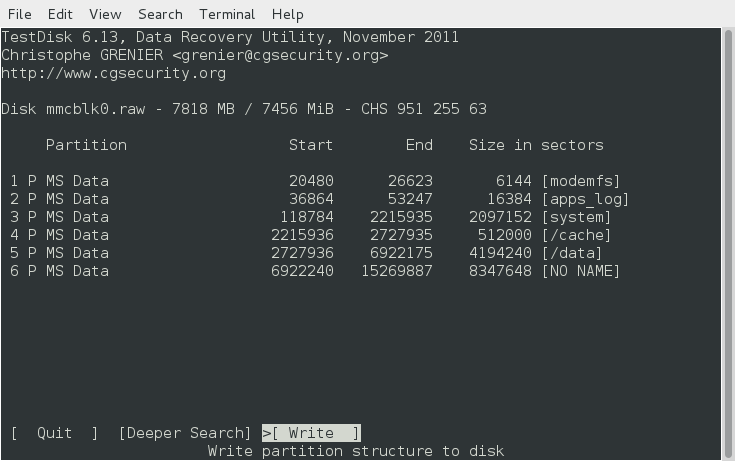
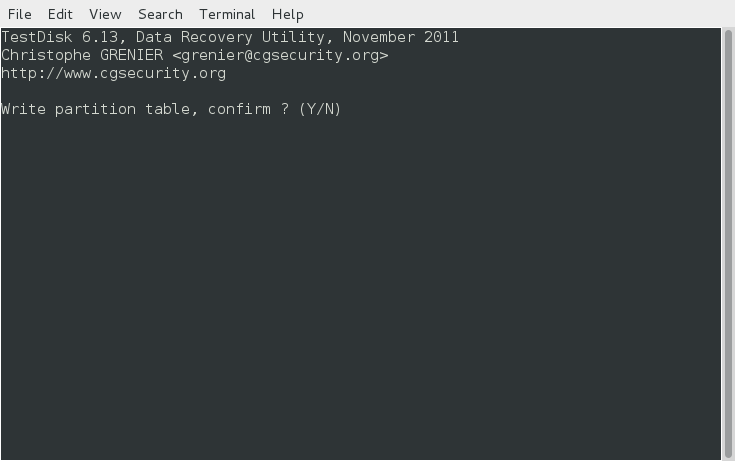
Select Write to write this new(ly recovered) partition table. Then confirm with Y:
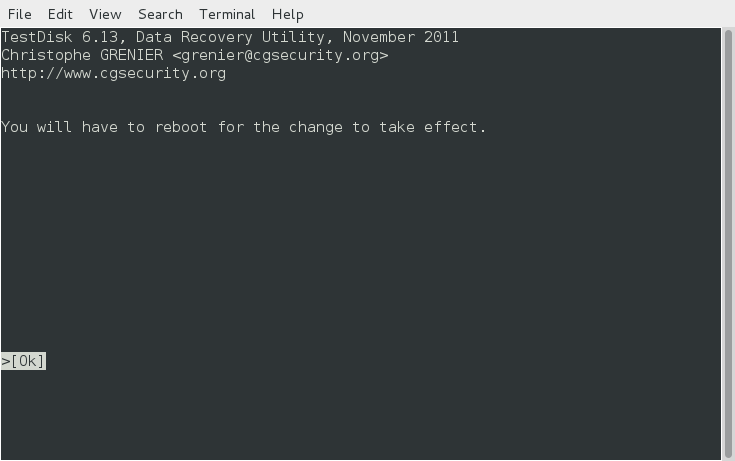
You will then be informed that you need to reboot. But in our case there is no need for that. Just press enter to continue:
Now the partition table is restored, and we can go on and try to recover the files.
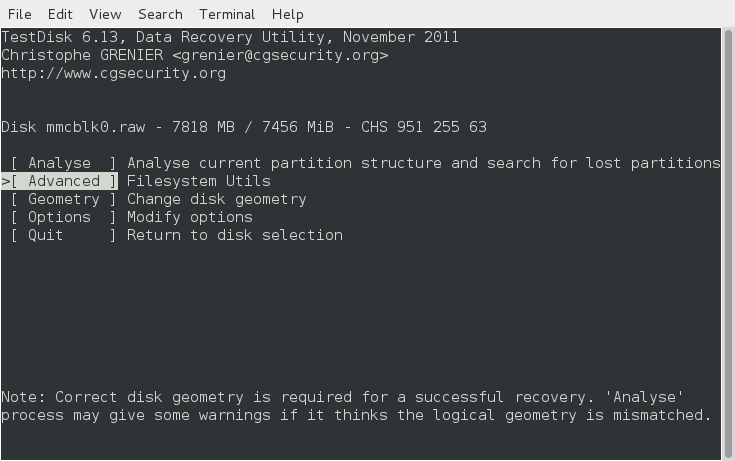
Select Advanced to use TestDisk's Filesystem Utils section:
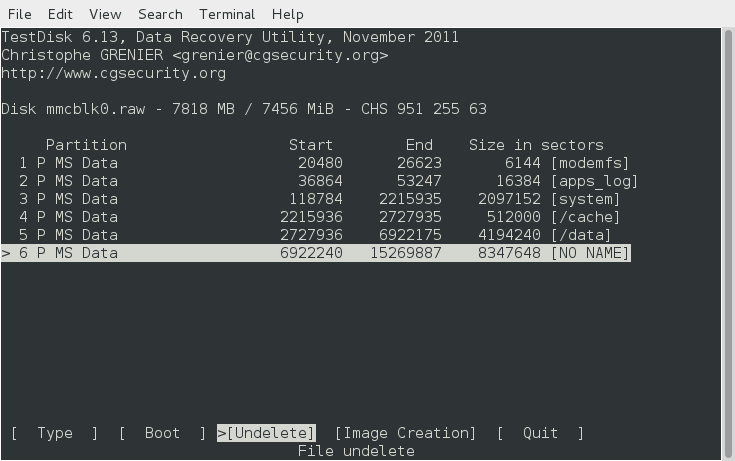
Select the partition where you want to do the recovery. In this example, we want to recover photos from the FAT32 SD Card partition with the Undelete option:
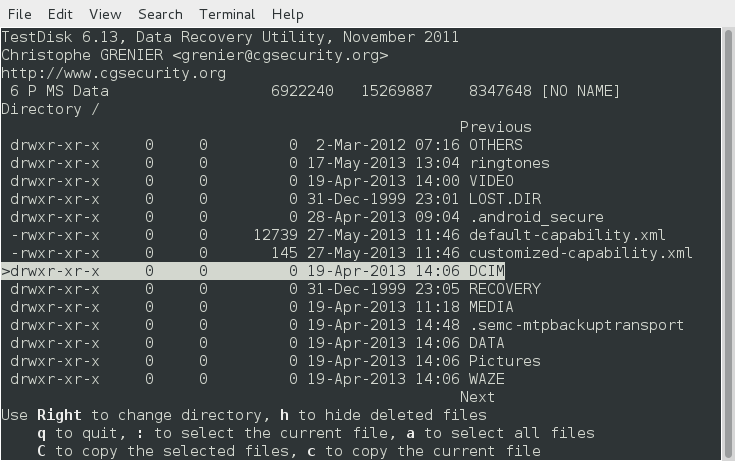
Now we can browse the filesystem for files that can be recovered:
In the /DCIM/100ANDRO directory, where my Android device stores its camera images, we find a lot of files that can be recovered. Select all or some of them, and use either C or c to recover them to one of the Linux computer's file systems (e.g. your home directory):
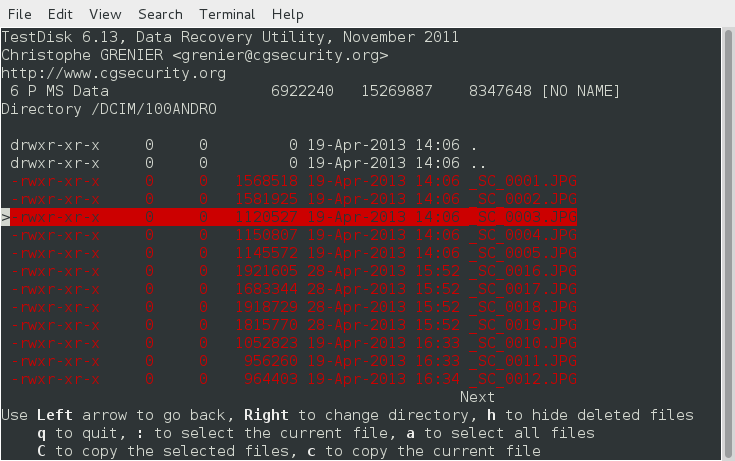
Done!
Optional: To recover files from an ext3/ext4 partition, TestDisk has an option Image Creation that will write an image called image.dd of that partition to a file on the Linux computer's file system:
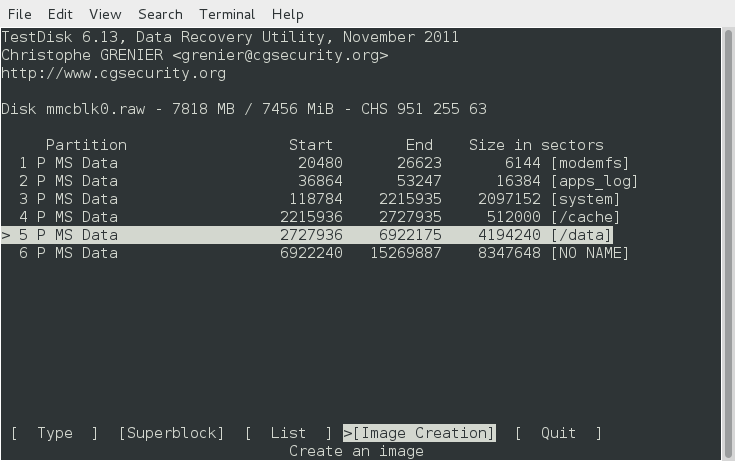
Then you can use extundelete in your terminal window to recover files from the image:
extundelete --restore-all image.dd
Thank you very much Mathias Brodala, Piotr Biesiada, André Paixão, Marc, Daniel Jeliński and Tim de Waal for sharing your valuable update suggestions and corrections.
